
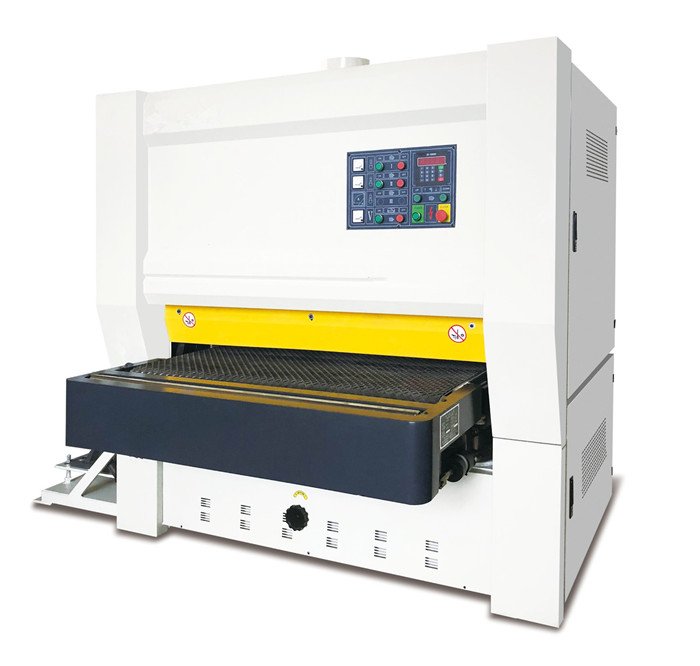
I faced rough boards, snipe1, and uneven thickness. I wasted time and money. I needed a planer thicknesser that fit my work and paid me back.
Choose by board size2, cutterhead type%%%FOOTNOTE_REF3%%%, [motor power](https://en.wikipedia.org/wiki/Plane(tool))4, bed length, dust control5, safety gear6, and support. Match capacity to your work. Choose low-snipe1 design. Check accuracy with test cuts7. Confirm parts and service.
I learned to slow down, measure my needs, and ignore hype. I focused on real boards, real setups, and real costs. I will show you what I check step by step.
What size and capacity do I need?
I bought my first machine too small. I then paid twice. Capacity drove my stress, and it drove my finish time and waste.
Choose width by your widest work plus margin. Choose thickness and depth of cut by your typical passes. Longer beds reduce snipe1. Heavier frames damp vibration and improve finish.

Typical Board Sizes
I start with the boards on my bench. I measure width, thickness, and length. I add 20% margin. I match that to machine width and bed length. If I process doors or tabletops, I go wider and longer. If I do trim or cabinet parts, I prefer nimble machines with quick changeover8.
Key Capacity Specs
- Maximum planing width
- Maximum thickness
- Minimum thickness
- Depth of cut per pass
- Bed length and extension options
Capacity and Use Cases
I map my work into a simple table. It keeps me honest.
| Use case | Min width | Bed length | Depth per pass | Notes |
|---|---|---|---|---|
| Cabinet parts | 300 mm | 1200 mm | 1–2 mm | Fast setups |
| Solid tables | 410–510 mm | 1500+ mm | 1 mm | Heavy frame |
| Trim/moulding | 260–310 mm | 1000–1200 mm | 1 mm | Light, quick |
| Stair parts | 310–410 mm | 1400+ mm | 1–2 mm | Long stock |
I also watch machine weight. More mass helps cut quality. It reduces chatter. It helps with dense hardwoods. When in doubt, I size up once, not twice.
What cutterhead should I choose?
I tried straight knives. I then moved to helical inserts. Tear-out stopped. Noise dropped. My finish improved, and my time on sanding fell.
Straight knives cost less up front. Helical or spiral heads cut quieter, reduce tear-out, and lower long-term cost. For figured hardwoods, I choose carbide inserts every time.

Options
- Straight HSS knives
- Replaceable Tersa style knives
- Helical or spiral carbide insert heads
Trade-offs
I weigh my wood types, my budget, and my noise limits. I run a quick matrix.
| Cutterhead | Finish on tricky grain | Noise | Upfront cost | Maintenance |
|---|---|---|---|---|
| HSS straight | Fair | High | Low | Sharpen, set |
| Tersa | Good | Medium | Medium | Fast swap |
| Helical carbide | Excellent | Low | High | Rotate inserts |
Why I pick helical
Carbide inserts shear the fibers. They reduce tear-out on curly maple, walnut, and teak. They also give me four edges per insert. If I chip one, I rotate it in minutes. I also like the sound level. It makes long runs easier. If budget is tight, I choose Tersa as a solid middle ground. I avoid false savings on cheap straight knives if I handle hardwood often.
How do I check build quality9 and safety?
A bad frame flexes10. A short fence drifts. A poor guard scares me. I refuse to accept that risk in my shop.
Check castings, table flatness, fence rigidity, guard design, and emergency stops. Confirm CE/ETL marks. Test snipe1, parallelism, and vibration. Demand dust control5 and reliable brakes.
Frame and Tables
I run a straightedge across the infeed and outfeed tables. I look for flatness within 0.1–0.2 mm over the length. I check that tables lock firm. I test height movement for backlash. A heavy, ribbed casting with wide stance feet helps.
Fence and Guard
I push the fence sideways with firm pressure. It must not move. It must return square. I want easy micro-adjust. I want a sturdy bridge guard for jointing mode. It must cover the cutterhead at all times.
Electrical and Safety
- Emergency stop within easy reach
- Motor brake or DC injection brake
- Thermal overload protection
- Clear labels and CE/FCC/ETL where needed
Quality Test Table
| Check | Method | Target |
|---|---|---|
| Table flatness | Straightedge + feeler | ≤0.2 mm |
| Snipe | Test boards | Not visible or ≤0.1 mm |
| Parallelism | Calipers across width | ≤0.1 mm |
| Vibration | Coin test on table | Coin stands |
If any point fails, I walk away. I would rather delay a purchase than accept risk and rework.
Which features and accessories cut my downtime and cost?
I used to accept long changeovers. I then tracked time. I saw hours wasted on setup, dust cleanup, and knife changes.
Look for quick changeover8, digital readouts11, bed rollers, long tables, mobile bases, and strong dust ports. Ask for spare parts kits12 and local service13. Time saved pays for upgrades.
Setup Speed
Changeover between planing and thicknessing should be fast and repeatable. I like machines with single-lever change or synchronized lifts. I want clear scales and positive stops. A digital readout for thickness saves me trial passes.
Material Handling
Longer infeed and outfeed supports stop snipe1. Bed rollers help with wet or rough stock. For fine finish, I lower rollers to flush. I keep pressure bars clean and aligned. A good feed system with two or more speeds lets me choose finish or throughput.
Dust and Noise
A 100–120 mm dust port and 1000+ m³/h airflow capture chips. It protects the cutterhead finish and bearings. Strong dust collection also helps reduce snipe1. Good sealing and sound dampening matter in shared spaces.
Feature Value Table
| Feature | Benefit | When it matters |
|---|---|---|
| DRO for thickness | Accurate first pass | Batch parts |
| Helical head | Less sanding | Figured wood |
| Long tables | Less snipe1 | Long boards |
| Two-speed feed | Control finish | Mixed stock |
| Mobile base | Small shop | Tight space |
I also ask for a spare insert pack, belts, and bearings. With that, I stay up even if shipping takes time.
Conclusion
Match capacity to your boards. Pick the right cutterhead. Test build quality9. Add features that save time. Then confirm service and parts.
Learn about snipe and how to prevent it for better quality finishes in your woodworking. ↩
Learn how to choose the right board size for your projects to avoid mistakes and save costs. ↩
Discover the various cutterhead types and their advantages to make an informed choice. ↩
Understand the importance of motor power in woodworking planers for optimal performance. ↩
Find out how to implement effective dust control in your workshop for a cleaner environment. ↩
Discover the essential safety gear needed to protect yourself while woodworking. ↩
Explore techniques for ensuring accuracy in your woodworking projects through test cuts. ↩
Find out which features can help you achieve quick changeovers, saving you valuable time. ↩
Get insights on assessing build quality to ensure safety and durability in your tools. ↩
Learn how to identify frame flex to avoid purchasing unreliable woodworking machines. ↩
Explore the benefits of digital readouts for enhancing accuracy in your woodworking tasks. ↩
Understand the importance of having spare parts kits to minimize downtime in your workshop. ↩
Learn how to find reliable local service for your woodworking machinery to ensure longevity. ↩